




Avoid a $220,000 Surprise: Ordinance or Law Coverage, Ask Your Agent
- andrew2biscay
- 1 day ago
- 12 min read

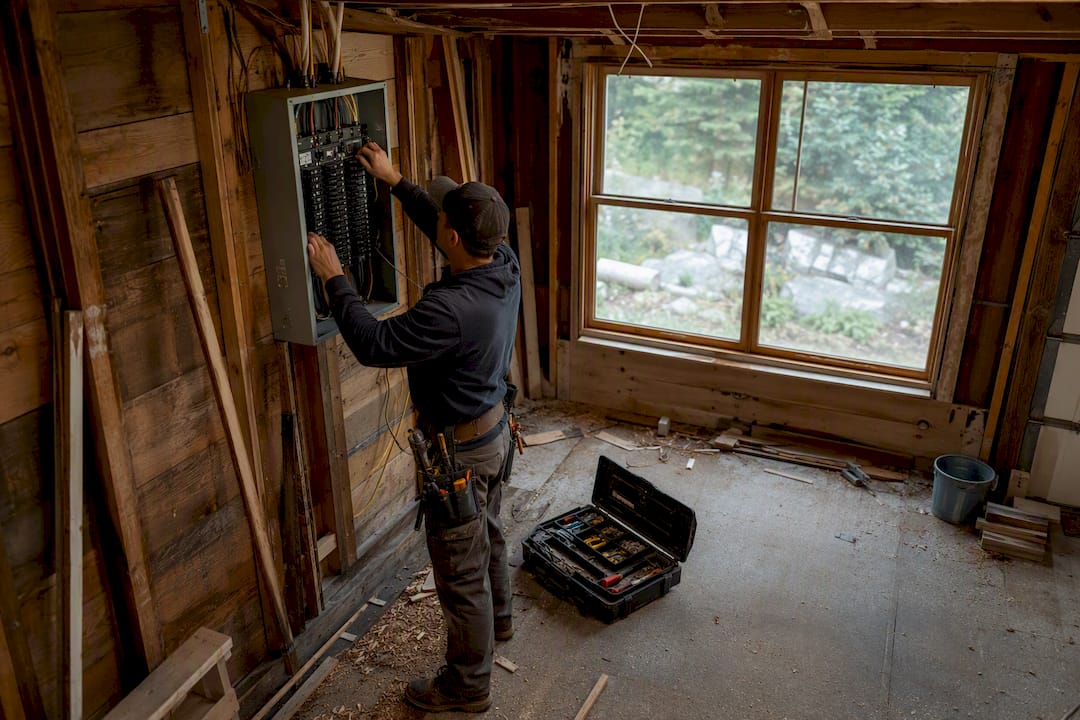
Ordinance or law coverage pays the extra cost of rebuilding a damaged home to meet current building codes, not the older standard it was originally built to. It kicks in when a covered loss, like a fire or windstorm, forces you to bring wiring, plumbing, or structural elements up to today’s code because a local permit office requires it. If your home is more than a couple of decades old, pull out your declarations page or call your agent this week and check whether you have it.
TL;DR:
Most homeowners policies include a small automatic limit, around $10,000, for ordinance or law coverage, but actual protection requires a separate endorsement.
This coverage pays for demolition costs, debris removal, and code upgrades needed after a covered loss in older homes or properties in areas with recent code updates.
To be effective, the endorsement must be added before a loss occurs, with documentation such as permits, estimates, and photos required to file a claim.
Coverage limits commonly range from 10% to 25% of dwelling coverage, with higher tiers advisable for homes with outdated systems or in heavily regulated districts.
Identifying the correct trigger language and understanding local code changes are essential to ensure comprehensive protection during rebuilds.
Table of Contents
What Ordinance or Law Coverage Actually Pays For
Every ordinance or law endorsement breaks down into three pieces, and knowing them separately is the fastest way to understand what you’re actually buying.
Coverage A pays to repair or replace the undamaged portion of your home when local code requires tearing it down anyway. If a fire destroys 40% of your house but the building department orders a full teardown because partial rebuilds violate current code, Coverage A covers the part your standard policy would otherwise treat as fine.
Coverage B pays demolition costs and debris removal tied specifically to the ordinance-driven teardown, separate from the debris removal your base policy already includes for the damaged section.
Coverage C, often called increased cost of construction, pays for the code upgrades themselves: new electrical panels, upgraded plumbing, elevated foundations, better insulation, whatever the current building code now mandates that your old home didn’t have.
Typical limits run as a percentage of your dwelling coverage, most commonly 10%, with optional tiers at 25%, 50%, and even 100% depending on the carrier.
Common exclusions include voluntary upgrades you want but aren’t required, pollution or mold remediation, and damage from perils your policy already excludes, like flood or earthquake, unless covered separately.
First moves after a loss: photograph everything before cleanup, get a written notice from the building department if code compliance is required, and call your agent before signing any contractor agreement.
The endorsement matters because standard property forms typically exclude these added costs entirely unless you’ve specifically added this coverage.
How Ordinance or Law Coverage Actually Works
The trigger is simple in concept but easy to miss in practice: you need a covered cause of loss (fire, wind, hail, a falling tree) combined with a local ordinance or building code that requires upgrades during repair. Neither one alone does anything. A code update passed by your city council last year doesn’t pay you a dime unless your home also suffers a covered loss that forces you into a rebuild governed by that new code.
Most standard homeowners policies bake in a small automatic allowance for this, often around $10,000, and expect you to buy more through a separate endorsement if your exposure is larger. ISO’s CP 04 05 form is the industry template many carriers use, though some insurers write their own version with different limit structures and trigger language. That small built-in number isn’t a signal your risk is low; it’s usually the opposite. Insurers set it low on purpose because they expect homeowners who need real protection to ask for it.
Increased cost of construction, the technical term behind Coverage C, is where most homeowners get surprised. Say your 1970s ranch has a detached garage wired for a different era. A kitchen fire forces a partial rebuild, and the electrical inspector won’t sign off unless the whole panel is brought current. That panel upgrade, the rewiring, the possible relocation of outlets to meet spacing codes, all of it falls under increased cost of construction, and none of it is “repair” in the traditional sense your base dwelling coverage was built to pay for.
Timing matters more than people expect. The endorsement itself can typically be added to your policy within a day or two of calling your agent. But it only applies to losses that happen after the endorsement’s effective date. Adding it the week after a fire does nothing for that fire. This is why waiting until you think you’ll need it is the single most common and costly mistake homeowners make with this coverage.
Documentation requirements kick in the moment a claim starts. Insurers generally want the building department’s written notice of required upgrades, contractor estimates itemizing the code-driven work separately from standard repair work, permits pulled for the upgraded scope, and before-and-after photos. TWIA’s claims guidance outlines a filing window, commonly around two years, for submitting additional-cost claims tied to increased cost of construction, so this isn’t a “file it whenever” situation. Miss the window and you may forfeit money you were otherwise entitled to.
One nuance worth sitting with: coverage only applies once a covered peril triggers the loss in the first place. If the underlying damage stems from a peril your policy excludes, flood being the classic example, the ordinance-or-law endorsement never gets the chance to activate, no matter how strict the local code is.
Coverage A, B, and C in Real Dollar Terms
Numbers make this coverage click faster than definitions do. Say your home carries a $400,000 dwelling limit. Your local building department decides that crosses the “substantially damaged” threshold, which many jurisdictions set around 50% of value, and orders a full teardown and rebuild rather than a partial repair.
Coverage A pays for the undamaged 55%. Your standard dwelling coverage handles the $180,000 in direct fire damage. Coverage A steps in to pay for demolishing and rebuilding the remaining $220,000 worth of structure that survived the fire but can’t legally stay standing under the ordinance. Without this coverage, that $220,000 comes out of your pocket.
Coverage B pays for tearing the surviving structure down. Demolition crews, hauling, dump fees, and site clearing for the ordinance-driven portion of the teardown. This is separate from the debris removal your base policy already covers for the fire-damaged section, and it can run into the tens of thousands on a full rebuild.
Coverage C pays for bringing the whole rebuild up to current code. New wiring throughout, upgraded HVAC ductwork, possibly elevated foundation requirements if your area’s flood maps changed, better insulation values, wider stairwell clearances. On a full rebuild of an older home, this line item alone can run six figures.
Now the math on limits.
When Higher Ordinance or Law Limits Make Sense
Not every homeowner needs to max this coverage out. But certain properties carry enough exposure that skipping it, or underbuying it, is a real financial gamble.
Homes built before the 1980s often carry knob-and-tube wiring, galvanized or clay plumbing, and structural elements that no current inspector will sign off on without a full upgrade. NerdWallet’s guidance on ordinance or law coverage points to exactly this pattern: older systems mean broader forced upgrades, which push exposure well past a small automatic limit.
Properties in historic districts face an odd twist: local preservation rules can require expensive, code-specific materials and methods for rebuilds, on top of standard code compliance, driving construction costs higher than a typical rebuild in the same city.
Homes near updated flood maps may face new elevation requirements after a loss, even if the original loss wasn’t flood-related, adding foundation work that a decades-old policy limit never anticipated.
Additions or conversions done without permits years ago can surface during a post-loss inspection, forcing retroactive code compliance on work you assumed was already settled.
Areas with active local code updates, cities that have recently revised electrical, plumbing, or energy codes, carry more exposure simply because the gap between “what your house has” and “what code now requires” keeps widening.
A quick call to your municipal building department, or a direct question to a contractor doing unrelated work at your house, can surface a lot of this before you ever file a claim. Ask what code triggers apply to partial versus full rebuilds in your area, and whether recent code cycles have added requirements around wiring, egress, or foundation height.
Pro Tip: Ask your contractor during any unrelated home project, a roof replacement, a kitchen remodel, whether they’ve run into local code surprises on homes your age. Contractors see these triggers constantly and will usually tell you straight if your neighborhood’s codes have gotten stricter.

How Much Ordinance or Law Coverage Should You Buy?
NerdWallet’s breakdown of coverage tiers confirms 10% is the most common baseline, with higher percentages available as an upgrade for an added premium.
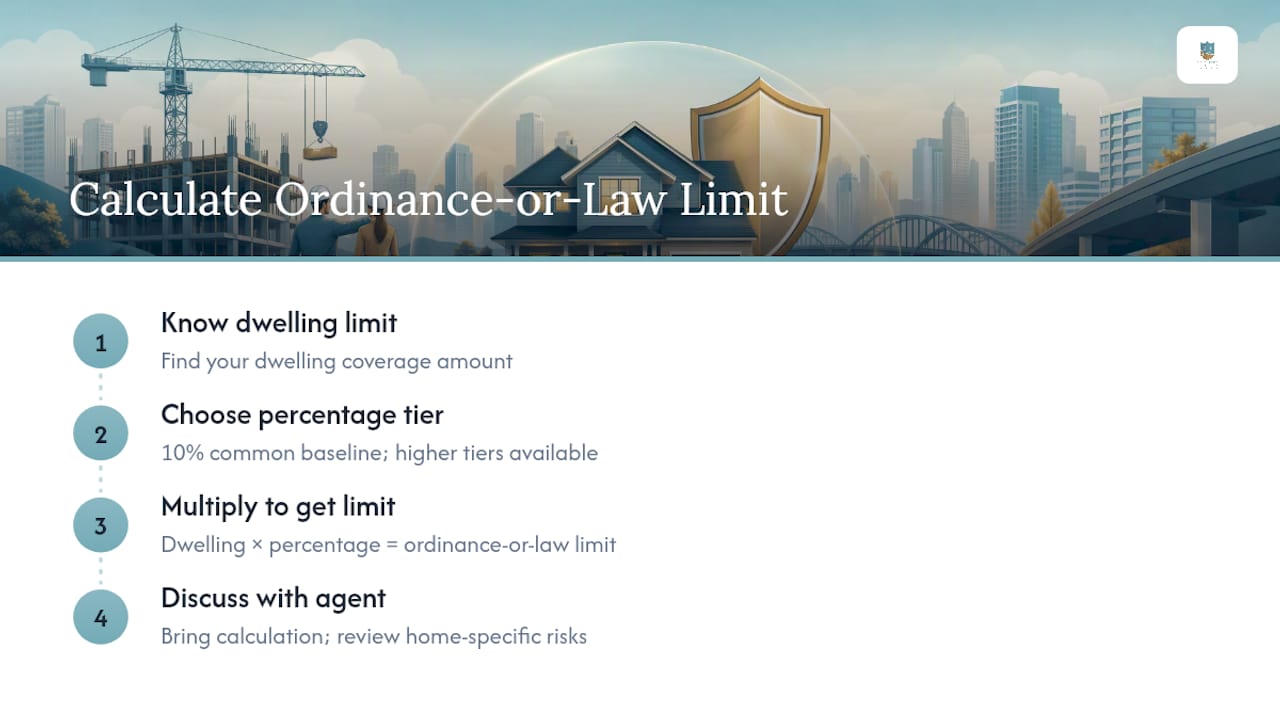
The math is straightforward once you have your dwelling limit in hand: multiply your dwelling coverage by the percentage tier to get your actual ordinance-or-law dollar limit. Run this calculation before you talk to your agent so you’re not guessing during the call.
Choosing the right tier comes down to a few honest questions about your specific house. How old are the electrical and plumbing systems? Has the home had any additions, especially unpermitted ones? Is it in a jurisdiction known for aggressive code enforcement or recent code cycle updates?
The tradeoff is premium cost against out-of-pocket exposure, and it’s rarely a close call in dollar terms. If you’re trying to offset that added premium elsewhere in your policy, our guide on lowering your home insurance premium covers practical ways to trim costs without cutting coverage that actually matters.
How to Add or Confirm Ordinance or Law Coverage
Getting this right takes one focused conversation with your agent, provided you walk in knowing what to ask for.
Pull your declarations page first. Look for a line item labeled “ordinance or law,” “increased cost of construction,” or sometimes just “ICC.” If you see a small flat dollar amount like $10,000 and nothing else, you likely have the automatic minimum, not a real endorsement.
Ask specifically about endorsement CP 04 05 or its carrier equivalent. Not every insurer uses the ISO form by name, but asking about it by name signals to your agent that you want real limit options, not just the default.
Request quotes at multiple tiers. Ask what 25%, 50%, and if available, 100% would cost in added premium, so you can compare against your home’s actual risk profile before deciding.
Confirm the trigger language. Some endorsements require enforcement of an ordinance already in effect at the time of loss; others cover ordinances passed afterward that still apply to your rebuild. This distinction has caused real disputes when policy wording wasn’t explicit.
Sign, confirm the effective date, and keep a copy. The endorsement generally activates fast, often within a day or two, but remember it only covers losses after that date, not anything that happened before.
Once it’s in place, keep a simple folder, digital or physical, with your permits, any contractor estimates for future reference, and building department correspondence. If a loss happens, insurers will typically ask for permits, itemized contractor estimates separating code-driven work from standard repair, before-and-after photos, and written notice from the building department confirming what code compliance is required. Having this organized before you need it shaves real time off claim processing. If you’re setting up a policy for a home you just bought, our new construction home insurance guide covers how these code-cost issues intersect with fresh builds specifically.
What Ordinance or Law Coverage Doesn’t Cover
This coverage has real limits, and knowing them ahead of time keeps you from assuming protection that isn’t there. It won’t pay for voluntary upgrades you want but aren’t required by code, that new kitchen island isn’t a code mandate no matter how badly you want it after a loss. It excludes pollution and environmental remediation costs, including asbestos abatement, even when a rebuild uncovers it, unless a separate endorsement addresses that specifically.
Mold remediation typically falls outside this coverage too, unless it’s a direct and covered consequence of the triggering peril and your policy’s mold provisions apply. Code violations that existed and were known before the loss, say an unpermitted addition you’ve been meaning to fix for years, generally aren’t retroactively covered just because a new claim brought them to light; insurers can treat those as pre-existing issues you were responsible for regardless of the endorsement.
And critically, ordinance or law coverage only activates alongside a covered cause of loss. If your loss stems from a peril your policy excludes, flood being the most common example in this context, the ordinance-or-law protection never gets triggered, even if the rebuild would otherwise require significant code upgrades. Litigation history backs up how much policy wording matters here. Courts have sided with insurers in disputes where ambiguous language left room to deny excess code-upgrade costs, which is exactly why confirming trigger language during setup, not after a loss, protects you.
Why an Agent’s Second Look Matters Here
Checking ordinance or law coverage properly takes more than glancing at a declarations page. A practical review usually includes a few concrete steps: scanning the dec page for the actual endorsement (not just the automatic minimum), checking whether your local building department has updated codes recently, having a contractor sanity-check what a real rebuild would likely require on your specific home, and understanding what documentation your carrier will want if a claim ever happens.
South Lake Agency Insurance Brokers builds this kind of review into how we work with homeowners, because independent brokers can compare endorsement limits and trigger language across more than 20 carriers rather than being stuck with whatever one insurer’s default happens to be. That matters most when a homeowner’s automatic limit looks fine on paper but wouldn’t survive contact with an actual older-home rebuild.
Scan the declarations page for the real endorsement, not just the automatic minimum figure.
Check local code activity, recent updates to electrical, plumbing, or foundation requirements matter more than people assume.
Vet contractor estimates for realistic code-upgrade costs before you commit to a limit tier.
Stay in contact with the building department when a claim is active, since they’re the ones deciding what “compliance” actually requires.
DIY quoting works fine if you already know exactly what endorsement language to ask for. Most homeowners don’t, and that’s precisely the gap a broker closes.
An Honest Take on Ordinance or Law Coverage
Most homeowners treat ordinance or law coverage as a checkbox, something an agent mentions once and they nod through. That’s a mistake. This is one of the few coverages where the gap between “technically covered” and “actually protected” can run into six figures, and the automatic minimum most policies carry exists specifically because insurers know most people won’t ask for more unless prompted.
My honest framework: if your home is older than 25 years, has had any unpermitted work, or sits in a city that’s been actively updating codes, don’t settle for the default tier. The premium difference is usually small. The exposure gap is not.
When you talk to an agent, ask three things directly: what’s my actual dollar limit at each tier, does my trigger language cover ordinances passed after the loss or only ones already in effect, and what would a full rebuild of my specific home likely cost to bring up to current code. Vague answers to any of those three questions mean you need a better conversation, or a different agent.
— Andrew
Get Your Ordinance or Law Coverage Reviewed the Right Way
South Lake Agency Insurance Brokers exists precisely for moments like this, where a coverage decision has real financial weight but most homeowners have no easy way to compare options across carriers.

Getting a proper review takes one call. We’ll look at your current dwelling limit, ask about your home’s age and any known code exposure, and pull quotes at higher ordinance-or-law tiers so you can see the actual premium difference before committing. If you’re buying a new home, we also coordinate directly with your lender and title company so endorsement questions don’t slow down closing. Start with a homeowners insurance quote and we’ll walk through your ordinance or law options as part of that same conversation, no separate appointment needed.
Where These Numbers and Definitions Come From
The three-component structure behind this coverage, along with the CP 04 05 endorsement details, comes from Adjusters International’s coverage breakdown, which also documents real litigation over ambiguous policy wording. Percentage-tier conventions and homeowner examples draw from NerdWallet’s ordinance or law explainer. Claim documentation and building-department procedures reference TWIA’s increased cost of construction guidance, and the core industry definition comes from IRMI’s insurance glossary. Each source addresses a different piece: definitions, dollar examples, and claims procedure, so cross-checking your own policy against all three angles is worth the twenty minutes it takes.
This article is general information, not a substitute for advice from a qualified financial advisor. Consult a qualified financial professional about your own circumstances before acting on anything here.
Sources
Recommended
Comments